Automating repo scaffolding with Azure DevOps
Integrating Cookiecutter with yaml pipelines in Azure DevOps to automatically scaffold repos, provides a simple and repeatable workflow and further minimises manual effort. This will show how we can set up this automation in DevOPs via yaml pipelines.
Workflow
Prerequisites
To set up repo scaffolding automation using Cookiecutter in Azure DevOps, we need the following:
- A Cookiecutter project template.
- An Azure DevOps yaml pipeline that uses the
cookiecuttercommand to generate a new project from the template. - An Azure DevOps project that contains the yaml pipeline.
The following diagram illustrates how the workflow to scaffold a repo in Azure DevOps is structured.
Phases
The workflow is broken down into 3 distinct phases of trigger, scaffold and publish.
- Trigger
- This is the first phase that can be done either manually or automatically, depending on what is required.
- If the process is automated, these triggers can be defined in the yaml pipeline or via a call from another pipeline or process.
- Crucially, the pipeline checkout process enables build agent access to the files needed for template generation, given these are stored in a repo.
- This phase will ensure we have the appropriate templates available for the build agent to call.
- Scaffold
- The second phased is the core of the scaffolding process in which we run commands in the build agent.
- Before the
cookiecutterprocess can be run, the appropriatecookiecutterlibraries will need to be downloaded onto the build agent. - As shown in the previous image, the scaffolding process has within it, a set of distinct sub-processes that ultimately lead to a “templated repo”.
- By invoking the
cookiecuttercommand, we execute the process to generate the templated repo.
- Publish
- The final step will publish a pipeline artifact and make a push to a git branch. Running both of these options simultaneously is not mandatory.
- By pushing to a git branch, there is flexibility for other downstream workflows to be triggered by referencing the git branch where the repo has been scaffolded to.
- By having a pipeline artifact, this can be downloaded for further inspection.
Steps
To demonstrate how we can scaffold repos using Azure DevOps, make sure you run through the workflow prerequisites and phases. For the following steps, we’ll assume that we already have a cookiecutter project template set up and an Azure DevOps project that contains the YAML pipeline. You are also welcome to use sample code in GitHub to allow you to follow along.
- In the project settings of your Azure DevOps project, create a new repository via the UI to save the
cookiecuttertemplates. - Save the files from the sample code into the main (or other) branch of the new repo created in Step 1.
- Make a note of the Azure DevOps organisation, project, repository, branch name (if not main) and
cookiecuttertemplate directory. - Navigate to the pipelines section and create a new YAML pipeline using the files saved in Step 2.
- In the YAML editor, change the variables as you see fit. An example of this is as follows:
variables: user_email : kimani.m@someemail.com user_name: kimani.m template_root: cookiecutter config_dir: config config_file: template_settings.yaml python_version: 3.10 - Save and execute the pipeline manually, by choosing
run pipelineas shown below.
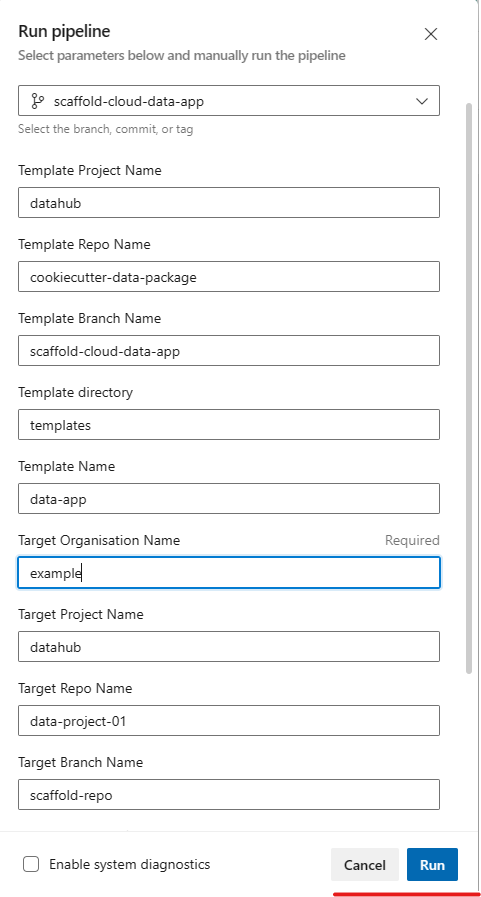
- Replace the pipeline parameters with values that are representative of your environment.
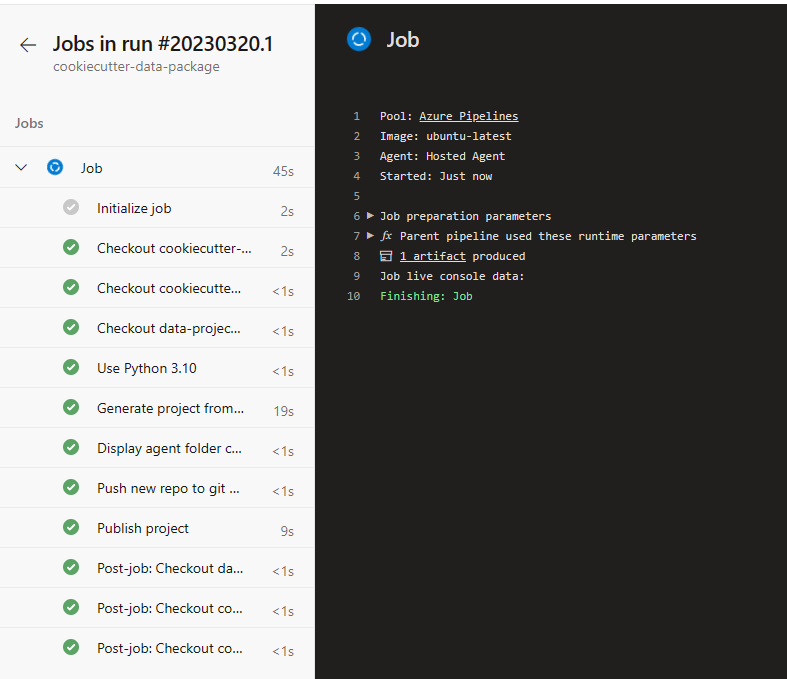
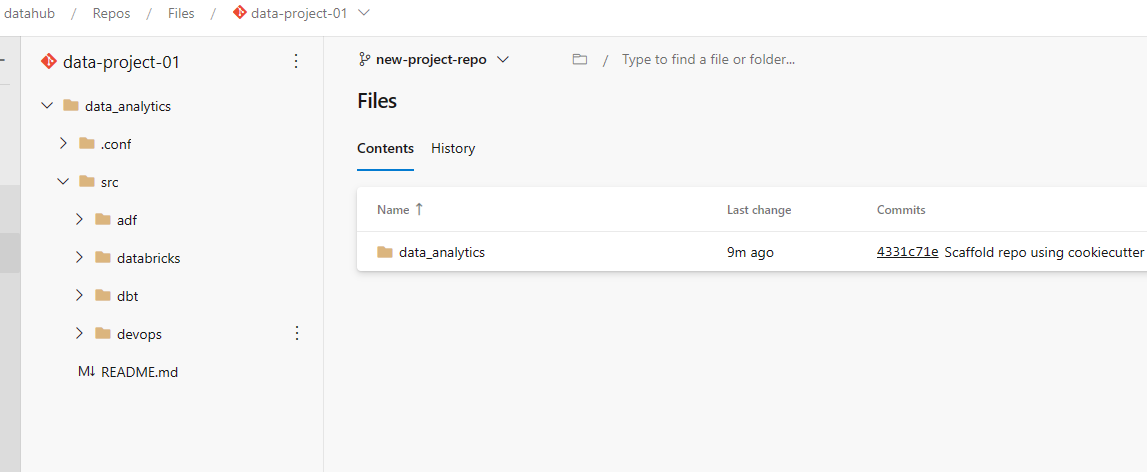
- The pipeline will then go through the 3 phases defined earlier to generate a new project based on the template and push to a git repo and once the run completes, it should look similar to the following images.
Template settings
The template settings file is in place to gather inputs for the scaffolding process. Instead of passing user input via the CLI, we have mechanism to supply the values we need for the workflow to run in an automated manner.
An example of the contents of the settings file is shown below:
default_context:
    project_name: "Data Analytics"
    created_by: "Kimani"
    version: "1.0.0"
    environment: "azure"
    target_platform: "databricks"
    devops: "y"
    data_ingestion: "y"
    data_transformation: "y"
    data_quality: "y"
    data_observability: "y"
    sample_data: "y"
    placeholder_files: false
    target_schema: "dev"
Summary
The repo scaffolding approach using Azure DevOps and cookiecutter, although simple and with a low barrier for entry, is quite powerful. We can now have in place, an extensible and portable scaffolding solution with the ability to add even more steps to build, test, and deploy the new project automatically in a variety of tools (e.g., GitHub, GitLab) and platforms (e.g., Linux, Windows).
Have a play with the solution and thanks for stopping by!